How to Install and Configure PuTTY
Introduction
PuTTY is an SSH and telnet client, developed originally by Simon Tatham for the Windows platform. PuTTY is open source software that is available with source code and is developed and supported by a group of volunteers.
Please note, these screenshots may become out of date as newer versions of PuTTY are released.
Downloading PuTTY
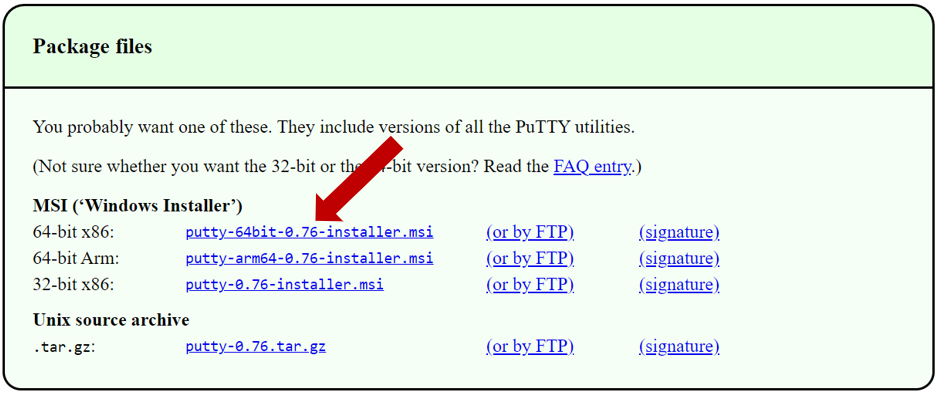
PuTTY can be directly downloaded here. Click the 64-bit x86 MSI installer as shown in the following screenshot:
Installing PuTTY
Now that you have downloaded the PuTTY installer, click the installer as shown in the bottom-left corner of your browser
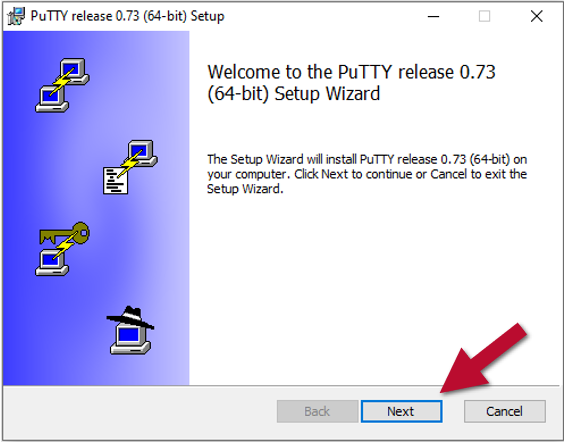
You will see a new window appear. Click "Next."
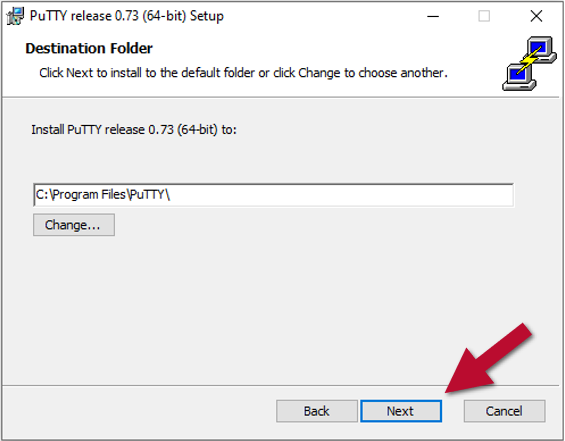
Click "Next once more.
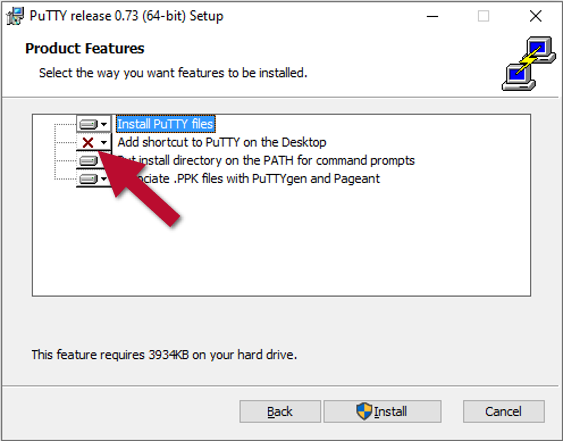
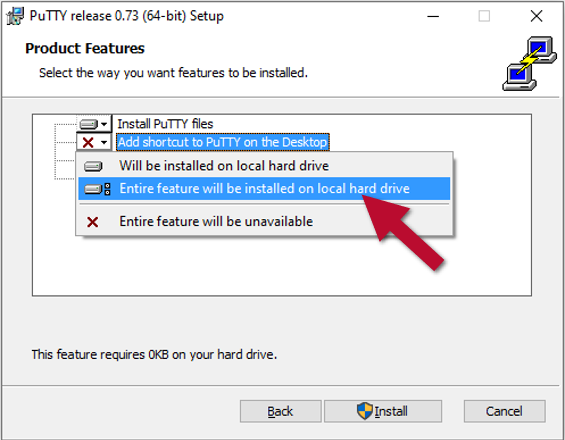
In the next setup screen, click the red "X" next to "Add shortcut to PuTTY on the Desktop, and select "Entire feature will be installed on local hard drive."
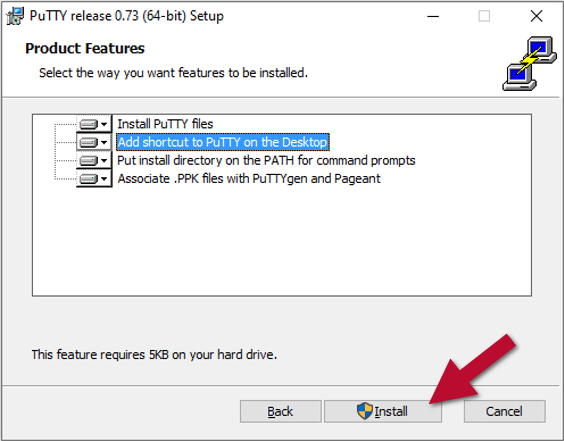
Next, click "Install." A window will appear in the middle of your screen asking "Do you want to allow this app to make changes to your device?" Click "Yes."
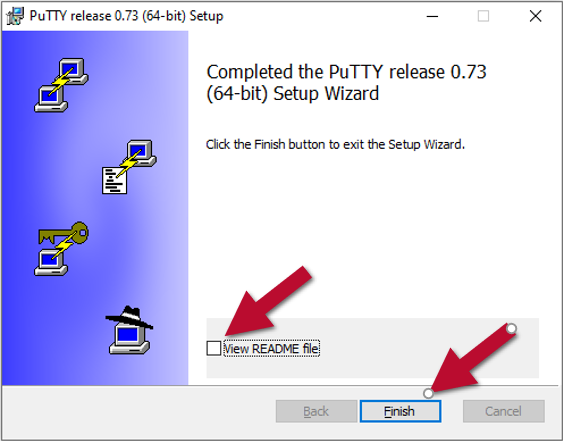
Once the installation has completed, you will see this screen as shown below. You may un-check the "View README" file if you wish, and then click "Finish."
Configuring PuTTY
Please Note: If you're off-campus or not connected to a UGA network, you will need to connect to UGA's remote.uga.edu VPN via the Cisco AnyConnect client before you can successfully connect to GACRC resources with PuTTY (or any other similar program). If you are on campus, connected to a UGA network, you don't have to worry about that. If you have set up Cisco AnyConnect before, more information can be found here
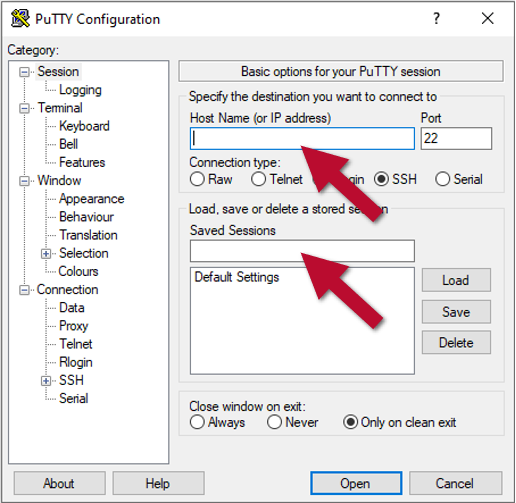
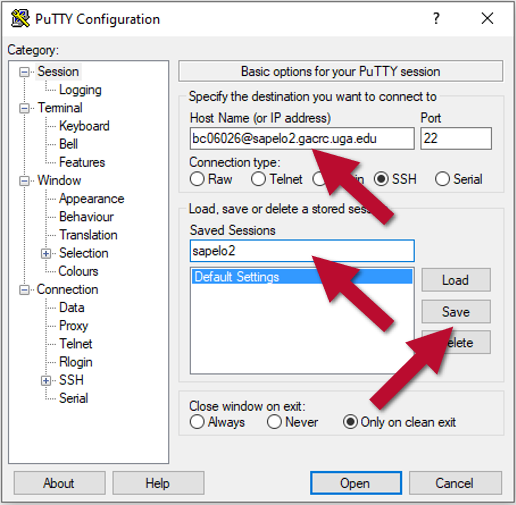
Now That PuTTY is installed on your computer, you can follow these steps to connect to GACRC resources (to which you are authorized to connect) with it. Double-click the PuTTY shortcut on your desktop, and you will see the following window (If you didn't put a shortcut on your desktop, search for "putty" in the windows search bar in the bottom left of your screen, next to the start button. Click the one that says "PuTTY", not PuTTYgen). You only have to edit these two text fields:
First, type YourMyID@hostname in the "Host Name (or IP address)" text field. hostname is the hostname of the GACRC resource to which you are connecting. Examples of those may be:
| GACRC Resource | Hostname |
|---|---|
| Linux Training Computer | trainer.gacrc.uga.edu |
| Sapelo2 Login Nodes | sapelo2.gacrc.uga.edu |
| Sapelo2 Transfer Nodes | xfer.gacrc.uga.edu |
| Teaching Cluster Login Nodes | teach.gacrc.uga.edu |
| Teaching Cluster Transfer Nodes | txfer.gacrc.uga.edu |
So for example, if my MyID were abc12345, and I was going to connect to the GACRC Linux training computer, then in the "Host Name (or IP address)" field, I would type abc12345@trainer.gacrc.uga.edu
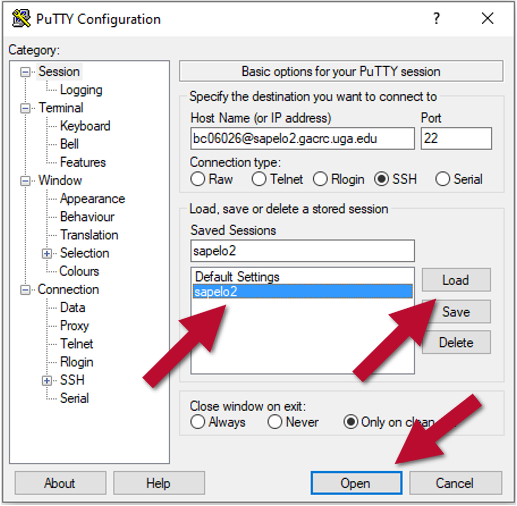
To save yourself the time, you can have PuTTY save what you type in the "Host Name (or IP address)" field by giving the connection a name in the "Saved Sessions" text field. In the screenshot below, I called mine "sapelo2", because I'm connecting to the Sapelo2 login nodes in that screenshot. The naming here is arbitrary. It's just a label for the text in the "Host Name (or IP address)" field. After typing a name for the connection in the "Saved Sessions" field, click the "Save" button as shown below.
Now the next time you open PuTTY, you can just click the label you made before, and then click "Load", and then "Open", to open a connection to the GACRC resource.
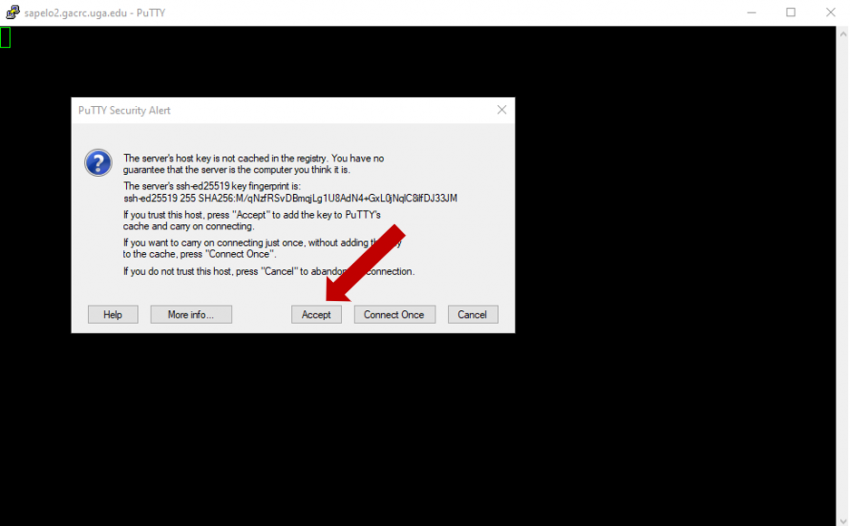
The first time you connect to a new computer with PuTTY, it will give you this security alert window, basically asking if you trust the computer you're connecting to. Answer affirmatively to the prompt shown and it won't ask you that again from that computer.
Now you're ready to enter your MyID password. It will look like you're not typing anything, but it is accepting your keyboard input. Just type your password and press enter. If it asks you for your password again, that could mean several things:
- Your password was typed incorrectly (make sure caps lock is off)
- Your username was typed incorrectly in PuTTY
- You are trying to access something you have not been given access to (in this case it would say something like "Access Denied".
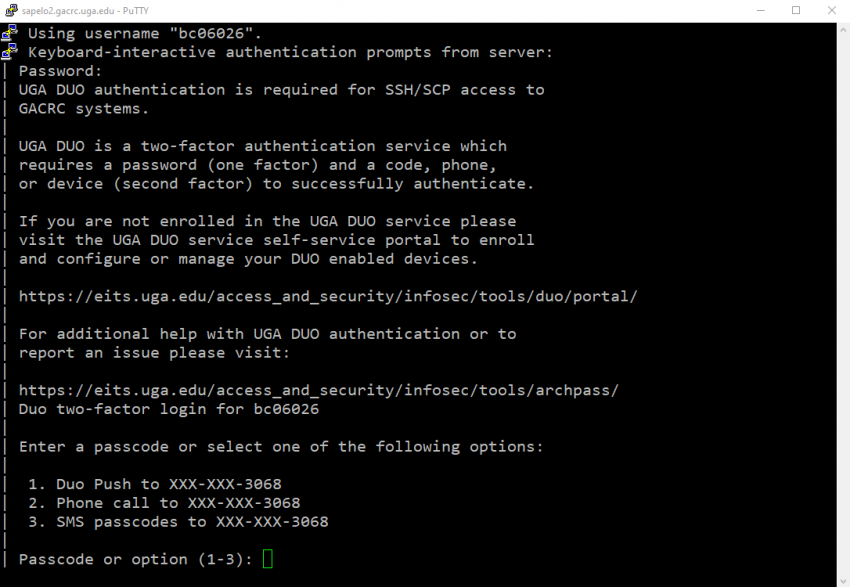
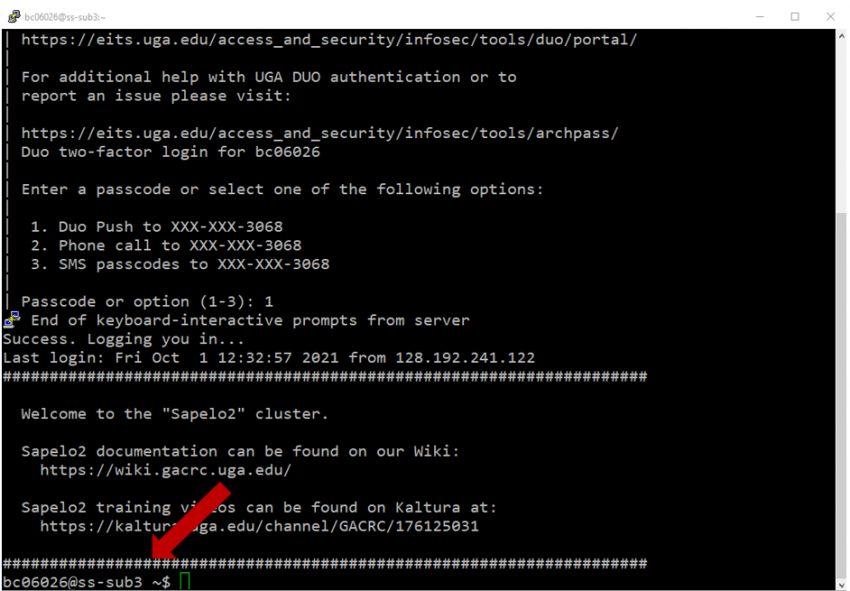
Most GACRC resources (except the Linux training computer), require authentication with ArchPass Duo, after a successful username/password authentication. As you can see in the screenshot below, you can type a 1, 2, or 3, depending on how you want to authenticate with ArchPass Duo. Most people use option 1. So you could just type 1 in the prompt, and then press enter. If have not set up ArchPass Duo on your mobile device, you can find more information about setting that up here
Once you successfully connect to a GACRC resource, you will see a command prompt with your username @ the name of the computer you're connected to, followed by a cursor, waiting for you to type a command. In the screenshot below, I connected to the Sapelo2 login nodes, and it put me on ss-sub3.
