How to Install and Configure PuTTY
Downloading PuTTY
PuTTY is an SSH and telnet client, developed originally by Simon Tatham for the Windows platform. PuTTY is open source software that is available with source code and is developed and supported by a group of volunteers. PuTTY can be directly downloaded here.
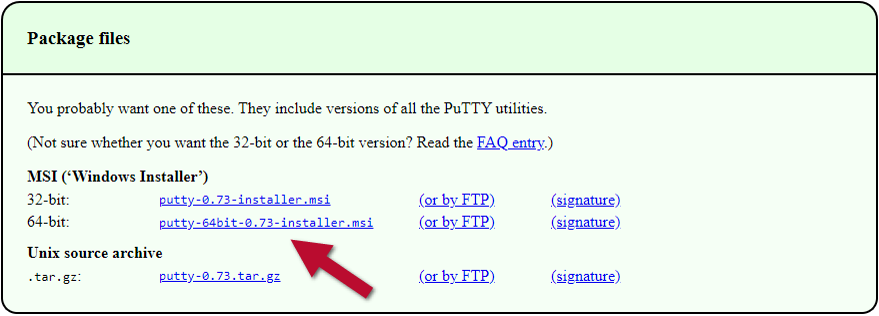
Click the 64-bit MSI installer as shown here:
Please note that with releases of newer versions of PuTTY, these screenshots may not match what you see.
Installing PuTTY
Now that you have downloaded the PuTTY installer, click the installer as shown in the bottom-left corner of your browser
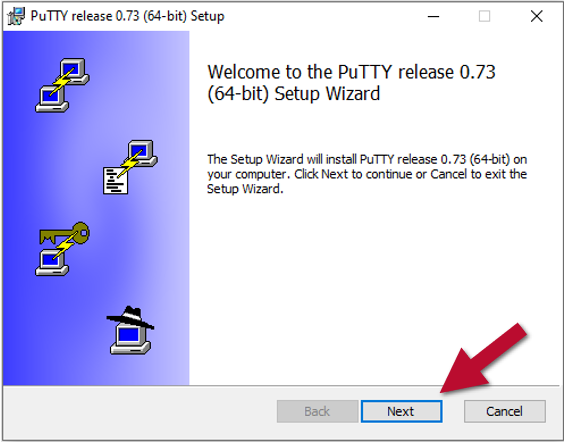
You will see a new window appear. Click "Next."
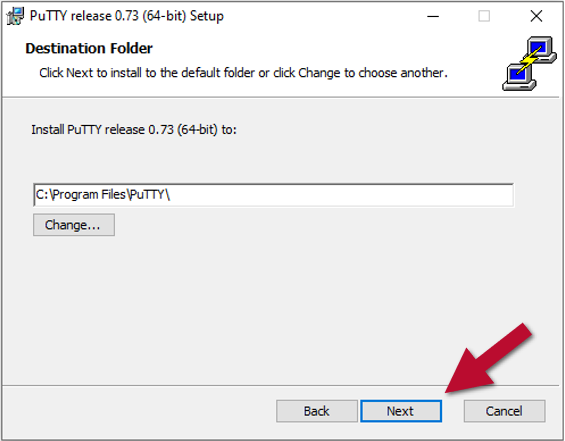
Click "Next once more.
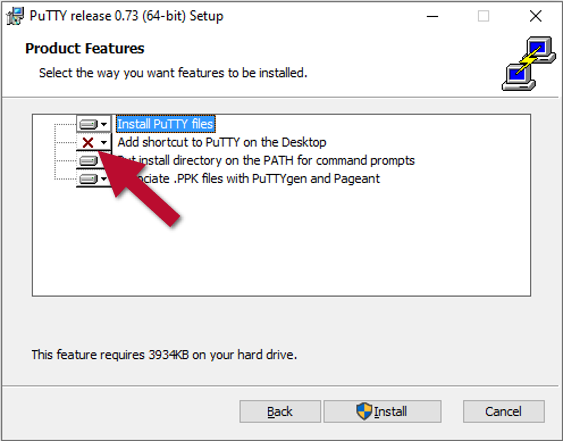
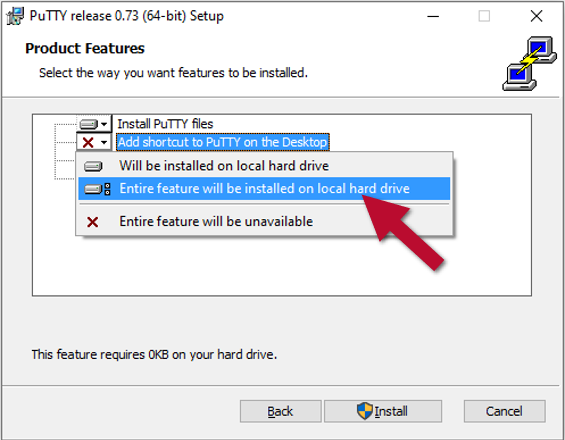
In the next setup screen, click the red "X" next to "Add shortcut to PuTTY on the Desktop, and select "Entire feature will be installed on local hard drive."
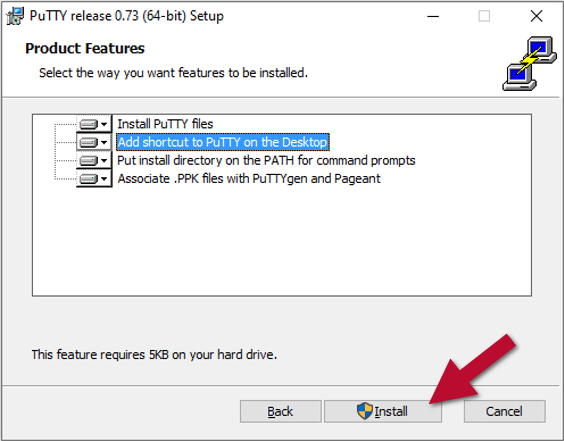
Next, click "Install." A window will appear in the middle of your screen asking "Do you want to allow this app to make changes to your device?" Click "Yes."
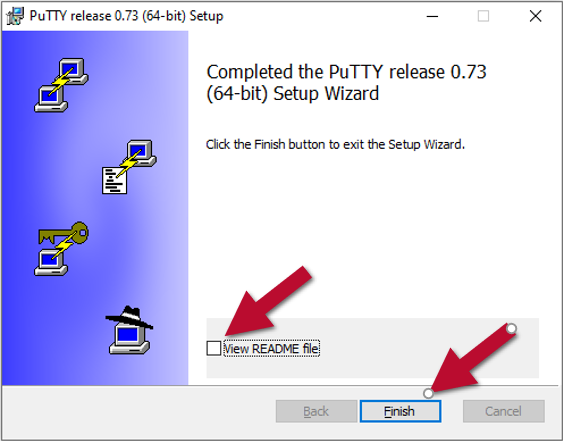
Once the installation has completed, you will see this screen as shown below. You may un-check the "View README" file if you wish, and then click "Finish."
Configuring PuTTY
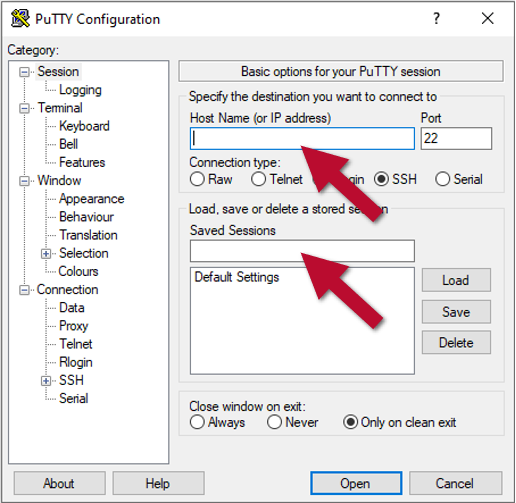
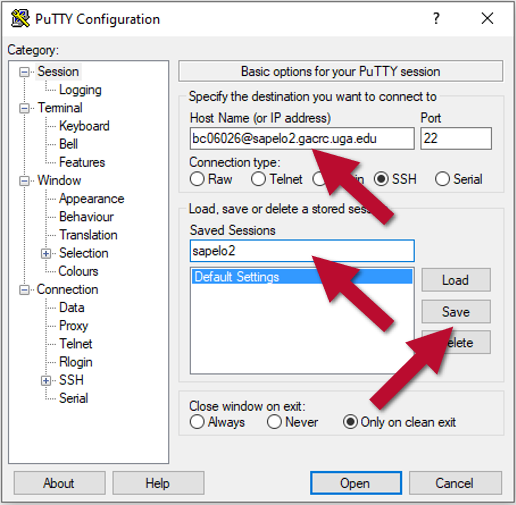
Now That PuTTY is installed on your computer, you can follow these steps to configure PuTTY to connect to UGA's HPC cluster. Double-click the PuTTY shortcut on your desktop, and you will see the following window. This is where you can create and save your connections to our cluster, so you don't have to type the host name every time. You only have to edit these two text fields:
First, type YourMyID@sapelo2.gacrc.uga.edu in the "Host Name (or IP address)" text field. Then give this connection a name in the "Saved Sessions" text field. I will simply call mine "sapelo2." Next, click the "Save" button as shown below.
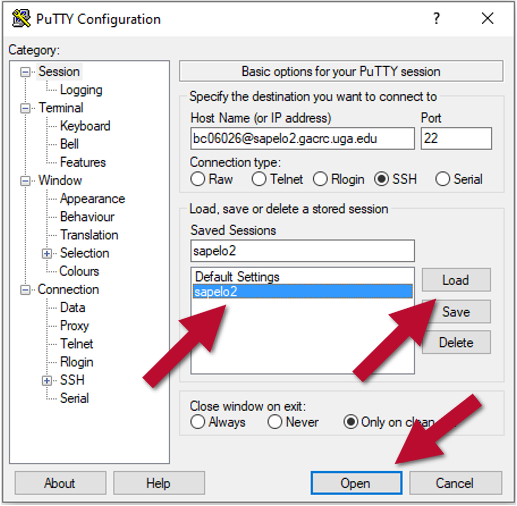
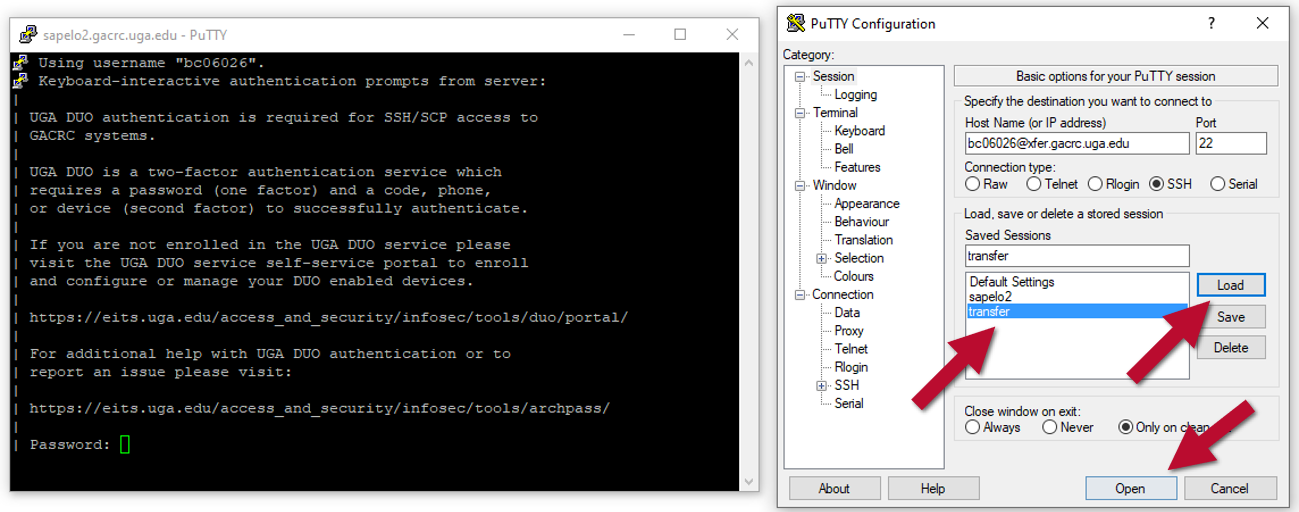
In order to open the connection you have just saved, either double click your connection name, or click it, then click "Load," and then click "Open" as shown below.
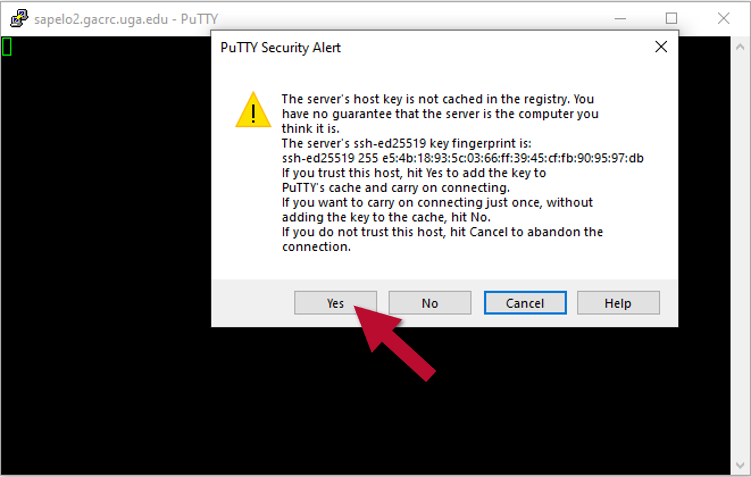
The first time you connect to a new computer with PuTTY, it will give you this security alert window. Click "Yes" and it won't ask you this again.
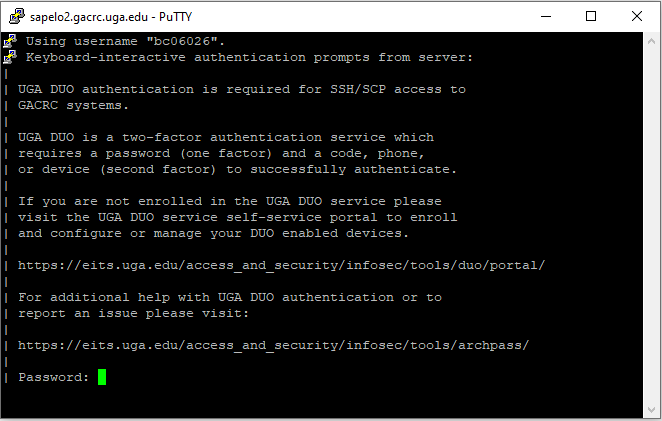
Now you're ready to enter your MyID password and initiate a DUO prompt.
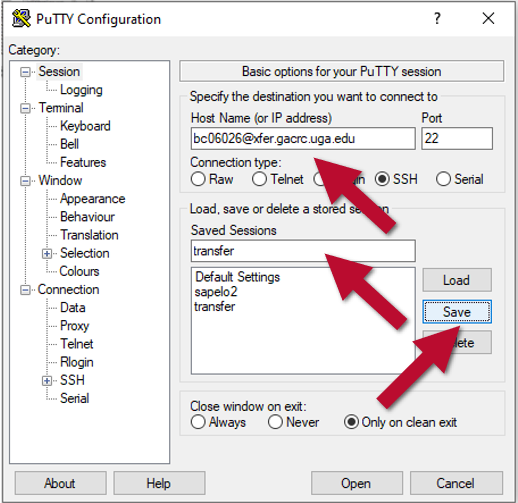
You can save multiple connections in PuTTY. For example, in the following screenshots, I'm repeating the steps from before to save a connection to our transfer node.
You can also have multiple PuTTY windows/connections open at the same time (even to the same computer, e.g. two concurrent connections to Sapelo2). To do this, simply double click the PuTTY shortcut on your desktop, and you will be able to open a new connection even if you already have one open, as shown below.
